Posted on 2022/05/01, 9:29 AM By admin22
Emscripten SDKを使って、WebブラウザでWeb Assemblyを実行してみました。
参考)
https://emscripten.org/docs/getting_started/downloads.html
git clone https://github.com/emscripten-core/emsdk.git
cd emsdk
git pull
./emsdk install latest
./emsdk activate latest
source ./emsdk_env.sh
参考)
https://developer.mozilla.org/ja/docs/WebAssembly/C_to_wasm
|
1 2 3 4 5 6 7 8 9 10 11 12 13 14 15 16 17 18 19 20 21 22 23 24 |
#include <stdio.h> #include <emscripten/emscripten.h> int main(int argc, char ** argv) { //printf("Hello World\n"); printf("Hello World : %d : %s\n", argc, argv[0]); } #ifdef __cplusplus extern "C" { #endif /* void EMSCRIPTEN_KEEPALIVE myFunction(int argc, char ** argv) { printf("MyFunction Called %d: \n",argc); //printf("MyFunction Called %d: %s\n",argc,argv[0]); } */ int EMSCRIPTEN_KEEPALIVE myFunction(int p1, int p2) { return p1 + p2; } #ifdef __cplusplus } #endif |
ドキュメントにあるCの参考コードに、関数の入力と出力を加えました。
emcc hello3.c -s WASM=1 -o hello3.html -s NO_EXIT_RUNTIME=1 -s “EXTRA_EXPORTED_RUNTIME_METHODS=[‘ccall’]”
このコマンドで .html, .jsを自動生成してくれます。
|
1 2 3 4 5 6 7 8 9 10 11 12 13 14 15 16 17 18 19 20 21 22 23 |
........ </script> <script async type="text/javascript" src="hello3.js"> </script> <!--<button class="mybutton">Run myFunction</button> --> <button id="mybutton">Run myFunction</button> <script type="text/javascript"> document.getElementById('mybutton').addEventListener('click', function(){ alert('check console'); var result = Module.ccall('myFunction', // name of C function 'number', //null, // return type ['number', 'number'], //null, // argument types [10, 20]); //null); // arguments console.log(result); }); </script> </body> </html> |
.htmlファイルを上記のように変更します。
python3 -m http.server
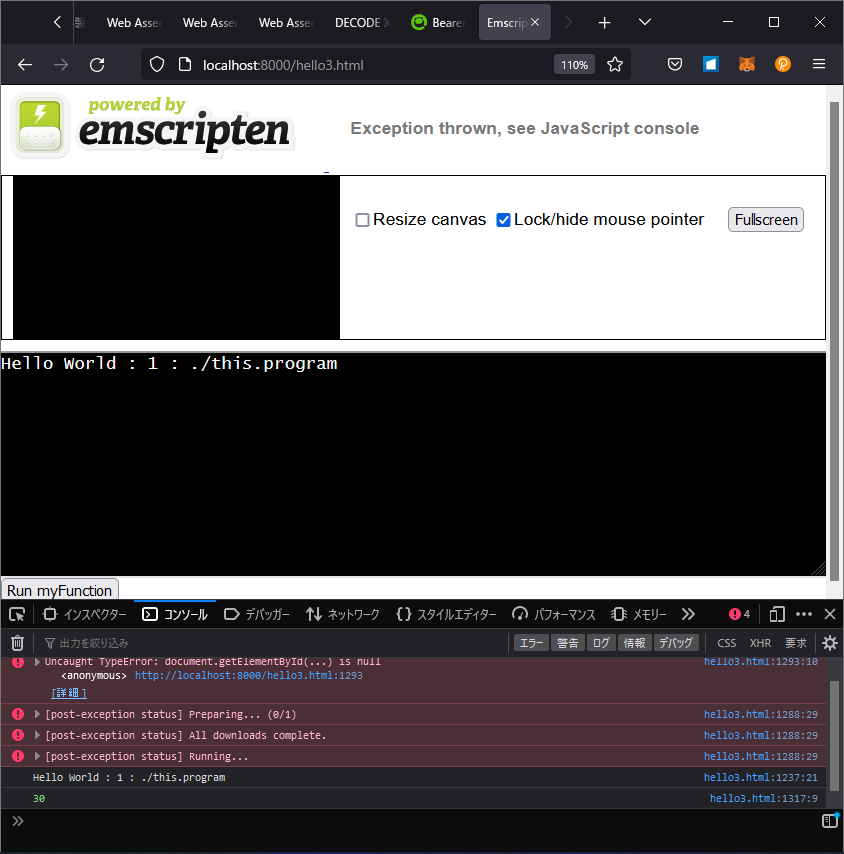
Pythonの簡易 Webサーバを使って .htmlファイルを読み込みます。
ボタンをクリックすると足し算の結果をコンソールに表示します。
Emscripten 便利です。
Categories: 未分類 タグ: Assembly

